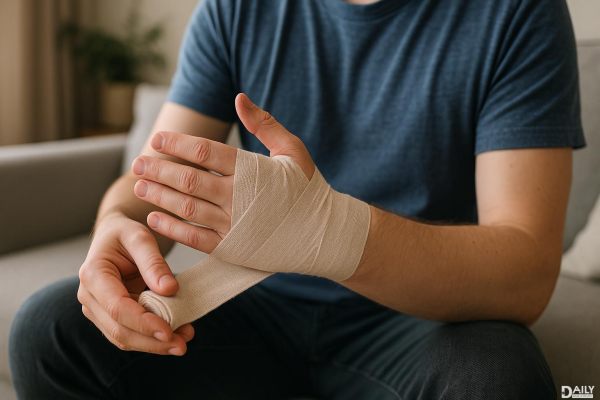
Hand injuries can be a real pain—literally. Whether you’re dealing with a sprain, strain, or just need extra support during a workout, knowing how to wrap your hand properly can make all the difference. Wrapping your hand not only provides stability but also helps speed up recovery by reducing swelling and preventing further injury. Let’s dive into the easiest and most effective way to wrap your hand like a pro.
Wrapping your hand isn’t just for boxers or athletes—it’s a simple yet powerful technique for anyone dealing with hand discomfort. When you wrap your hand, you’re essentially creating a supportive barrier that keeps your joints and muscles in place. This is especially crucial if you’ve got a mild injury or are prone to overuse. A good wrap can help reduce pain, prevent excessive movement, and even improve blood flow to the area, which speeds up healing. Plus, it’s a lot cheaper than splints or braces, and you can do it yourself in minutes.
Before you start wrapping, gather the essentials. You’ll need a roll of self-adhesive athletic tape or cohesive bandage (the kind that sticks to itself, not your skin). These are widely available at drugstores or sporting goods shops. Avoid using regular medical tape—it’s not flexible enough and can irritate your skin. You might also want a pair of scissors handy to cut the tape to size. Pro tip: If you’re wrapping for a workout, consider using pre-wrap foam underneath the tape to protect your skin from irritation.
Start by cleaning and drying your hand thoroughly. Any moisture can make the tape less effective. Begin at the base of your wrist, wrapping the tape around twice to create a secure anchor. From there, move the tape diagonally across the back of your hand, looping it around your thumb for extra support. Continue wrapping in a figure-eight pattern, covering the back of your hand and wrist alternately. Make sure the wrap is snug but not too tight—you don’t want to cut off circulation. Finish by securing the tape back at your wrist and trimming any excess. Voila! You’ve got a hand wrap that’s both supportive and comfortable.
Wrapping your hand might seem straightforward, but there are a few pitfalls to watch out for. One big mistake is wrapping too tightly, which can restrict blood flow and cause numbness or tingling. Another is using the wrong type of tape—stick to self-adhesive or cohesive bandages for the best results. Also, avoid wrapping over open wounds or irritated skin, as this can lead to infections. Lastly, don’t skip the anchor wrap at the wrist; it’s what keeps everything in place and prevents the tape from unraveling.
While wrapping your hand can be a great DIY solution, it’s not a cure-all. If you’re experiencing severe pain, swelling, or difficulty moving your hand, it’s time to see a doctor. Persistent symptoms could indicate a more serious injury, like a fracture or torn ligament, that requires medical attention. A healthcare professional can assess your condition and recommend the best course of action, whether it’s physical therapy, a custom brace, or even surgery in extreme cases.
Wrapping your hand is just one piece of the recovery puzzle. To speed up healing, try icing the injured area for 15–20 minutes every few hours to reduce swelling. Elevating your hand above heart level can also help minimize inflammation. If you’re dealing with a strain or sprain, consider gentle stretching exercises once the pain subsides to restore flexibility. And don’t forget to give your hand a break—avoid activities that put too much strain on it until you’re fully healed.
Wrapping your hand doesn’t have to be complicated. With the right technique and a little practice, you can provide your hand with the support it needs to recover quickly and get back to doing what you love. So grab that tape, follow these steps, and give your hand the TLC it deserves!