After years of hard wear, my grimy baseball caps usually end up in the trash—because washing them never really worked. I tried the old dishwasher trick (you know, top rack, gentle cycle), but let’s be real—it was a bust. They came out warped, kinda faded, and honestly… still dirty.

Turns out, there’s a way better—and way easier—method to clean your beat-up ballcap without wrecking it. This trick brings it back to life, brightens the colors, and keeps it in the game for years. And the best part? You barely have to lift a finger.
Lucky for you, I had a few seriously nasty caps lying around—perfect for putting this method to the test. Ready to see the magic? Let’s go.
Quick Tips to Keep Your Caps Fresh
Spot Clean First – Hit stains with a little dish soap and a soft brush before the full wash.
Skip the Heat – Always use cold water to prevent shrinking and color bleed.
Air Dry Only – Never toss your cap in the dryer—let it dry naturally to keep its shape.
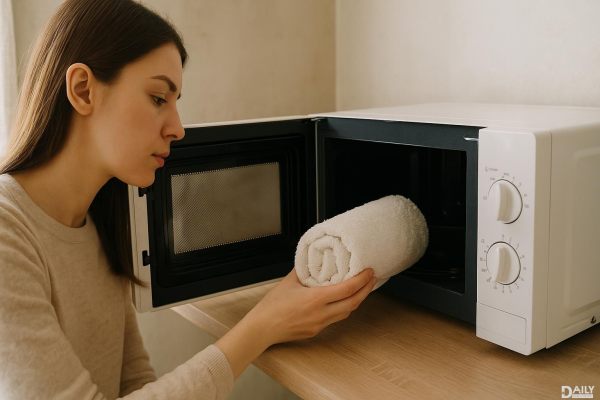
Stuff the Crown – Roll up a towel inside to help it hold form while drying.
Avoid Harsh Chemicals – Stick to mild detergents to preserve fabric and colors.
Pro Move: For stubborn sweat stains, a mix of baking soda and water works wonders. Just scrub gently and rinse!
The Best Way to Wash a Baseball Cap
Your favorite cap doesn’t belong in the trash—it deserves a proper spa day. Here’s the step-by-step method that’ll make even your grimiest hat look fresh again:
What You’ll Need:
Cool/lukewarm water (hot water = enemy)
Laundry detergent or OxiClean (dish soap works in a pinch)
Soft-bristle toothbrush
Clean towel
Household item for shaping (coffee can, balled-up towel, etc.)
The Process:
1. Prep Your Cleaning Station
Fill a sink or bucket with cool water (warm is okay, but never hot—it’ll warp your cap).
Add 1 tbsp of laundry detergent or OxiClean. These fight stains better than dish soap.
2. Attack Stains Like a Pro
For sweat stains: Rub a dab of shampoo into the bill or inner band—it’s weirdly magical.
Gently scrub problem areas with a toothbrush. Go easy on stitched logos!
3. Soak It Out
Let the cap soak for 30 min to 2 hours. Check halfway: if stains linger, hit ’em again with the brush.
4. Rinse & Rescue the Shape
Rinse thoroughly with cool water. Never wring it out!
Pat dry with a towel, keeping the cap’s natural curve intact.
5. Dry Like You Mean It
Place the cap on a coffee can, towel ball, or (if you’re fancy) a hat form.
Air dry only—no dryers! Speed it up with a fan on low.
Pro Tip: For polyester caps, skip the soak—just scrub and rinse to prevent color bleed.
Why This Works: Cool water protects colors, shampoo breaks down oils, and air-drying preserves structure. Your cap will look almost new—not like a sad, crumpled pancake.
Tips for Cleaning Wool Hats
Wool hats require extra care—they’re not like your average baseball cap. Whether it’s a vintage find or your favorite winter beanie, here’s how to clean wool without turning it into a shrunken, misshapen mess.
What You’ll Need:
Wool-safe detergent (like Woolite or Eucalan)
Cold water
Soft towel
Your head (yes, really—more on that later)
Step-by-Step:
1. Skip the Harsh Cleaners
Regular detergents can damage wool fibers. Use a wool-specific cleaner instead.
2. Soak—Don’t Scrub
Fill a basin with cold water and add wool detergent.
Gently swish the hat—no aggressive scrubbing! Wool can felt if handled roughly.
3. Rinse & Press (Don’t Wring!)
Rinse in cold water until soap-free.
Press out excess water with a towel—never twist or wring.
4. The Secret to Perfect Drying
Option 1: Pat dry, then wear it damp for a custom fit. (Yes, it’ll feel weird, but it prevents weird stretching.)
Option 2: Lay flat on a towel, reshaping it to its original form.
Tips for Cleaning Older Hats
If your cap’s been around since the ‘90s (or earlier), chances are it’s made with materials that aren’t as tough as today’s hats. Back in the day, bills were often cardboard—not the sturdy plastic you’ll find in modern caps.
Step 1: Test for Colorfastness
Most new hats are colorfast, meaning they won’t bleed when washed. But older caps? Not always. To check, dab a little cleaner on the underside of the bill with a rag. If color transfers, stick to water-only cleaning—otherwise, detergent is good to go.
Step 2: Spot-Clean Only
Never dunk an old hat in water—especially if it’s got a cardboard bill. Instead, grab a soft brush or cloth and gently scrub problem areas by hand. Harsh treatment could mean game over for your vintage lid.
Play it safe, and your old-school cap will keep its cool for years to come.
My Hats Look Brand New After Trying This Hand-Washing Hack
I put a few cleaning methods to the test—and the results speak for themselves. Take a look at the middle black-and-white cap (the one I didn’t wash). The stains on the bill are still there, and the white isn’t nearly as bright as the "Playoffs" cap next to it. That one got the full treatment—OxiClean brought the colors back to life and nearly erased the grime on the bill. Yeah, you can still see a faint shadow of the stains, but it’s a huge improvement.
The gray hat on the right? Also way cleaner—except for the back, which is still kinda nasty. Why? Because I skipped spot-cleaning. Big mistake. If your hat has stubborn stains, don’t just dunk it—hit those trouble spots first.
If your favorite baseball cap is crusty from sweat and sun, a solid hand wash can bring it back from the dead. Give it a shot—your hat (and your head) will thank you.
