If you're looking to add some explosive power to your home workouts without breaking the bank, building your own plyo box is the way to go. A sturdy plyo box lets you crush box jumps, step-ups, and even use it as a bench for strength moves—all while saving you a couple hundred bucks compared to store-bought versions. Plus, DIY means you can customize the height to match your fitness level. Let’s break down how to build one that’s strong, safe, and won’t have you stressing about collapse mid-jump.
First things first—gather your supplies. You don’t need fancy tools or expensive materials. A sheet of ¾-inch plywood (birch or oak works best for durability), wood screws (2-inch and 1¼-inch), wood glue, sandpaper, and a measuring tape will get you started. If you want a non-slip surface, grab some grip tape or rubber matting. A circular saw or table saw makes cutting easier, but a handsaw will do in a pinch. And don’t forget safety gear—gloves and goggles are a must unless you enjoy splinters and sawdust in your eyes.
Plyo boxes typically come in three standard heights—12, 18, and 24 inches—but you can adjust based on your needs. If you’re a beginner, start with a 12-inch box to nail your landing form before moving up. More advanced? Go for 18 or 24 inches to really challenge your vertical. Measure and mark your plywood carefully: you’ll need two side panels (your chosen height x depth, usually 16-20 inches), a top square (match depth for stability), and reinforcing strips for the corners. Pro tip: double-check measurements before cutting—nothing’s worse than uneven legs.
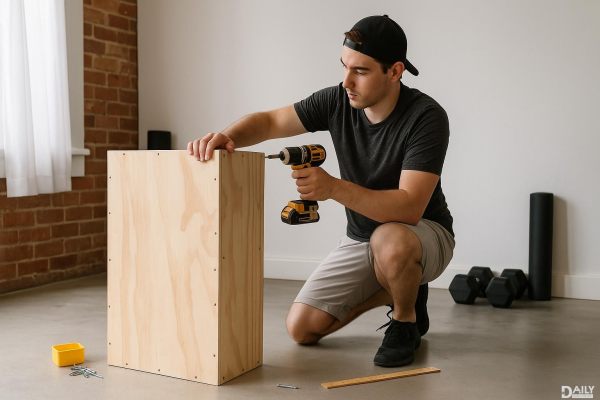
Once your plywood is marked, cut out all pieces with smooth, even strokes to avoid jagged edges. Sand everything down—splinters and plyo jumps don’t mix. Start assembly by attaching the side panels to the top piece using wood glue and 2-inch screws for a rock-solid hold. Reinforce the inside corners with smaller strips of plywood screwed vertically; this keeps the box from wobbling under pressure. If you’re extra cautious, add triangular braces at the joints. Let the glue dry completely before moving to the next step—patience here means no shaky surprises later.
Flip the box over and check for wobbles—if it rocks, sand the legs lightly until it sits flat. For extra durability, coat the box with a layer of polyurethane or outdoor sealant, especially if you’ll be using it in a garage or backyard. If you’re all about that grip, apply rubber tread or adhesive tape to the top surface. Want to flex your creative side? Paint it with high-grip deck paint or stencil on motivational phrases (“Jump Higher” or “No Pain, No Gain” optional but highly encouraged).
Before you start launching yourself onto your new box, give it a stress test. Place it on a non-slip surface (like a yoga mat or rubber flooring) and apply pressure to all sides to check for creaks or shifts. If anything feels off, reinforce weak spots with additional screws or braces. Remember: a failed box jump because of shoddy construction is way worse than a failed jump because your legs gave out. Start with low-impact drills like step-ups to get comfortable, then progress to explosive jumps once you trust your build.
And there you have it—a custom plyo box that’s cheaper, sturdier, and more satisfying than anything you’d buy online. Not only will it level up your workouts, but you’ll also get bragging rights for building it yourself. Now go crush those box jumps like the DIY fitness champ you are.